

In today's age, our online activities leave behind a trail of data that can reveal a lot about our personal lives. One such source of information is our Google search history. Google stores a record of our searches, ranging from general queries to private information. Even if you delete your search history, it is crucial to understand that Google retains significant amounts of data associated with your searches, which are stored on their servers.
However, there are steps you can take to reduce the extent of data collection in the first place. One effective approach is to utilize the Best free VPN (Virtual Private Network) to prevent websites from gathering your data and safeguard your online privacy. In this article, we will provide you with a step-by-step guide on how to securely wipe your Google search history.
Why Does Google Store Your History?
Google being the most widely used search engine, has become an integral part of our digital lives. Whenever we enter a search query, Google delivers results instantaneously. However, have you ever wondered why Google stores your search history? In this section, we will explore the reasons behind Google's storage of your search history.
- Improving Search Results and Personalization:
Google analyzes your search history to understand your interests and preferences, tailoring search results for a more personalized browsing experience.
- Refining Advertising Strategies:
By storing your search history, Google gains insights into your browsing behaviour and demographics, allowing them to deliver more relevant and personalized advertisements.
- Developing and Enhancing Products and Services:
Google uses search history to identify user needs and trends, helping them refine existing products, introduce new features, and stay competitive in the tech industry.
- Enhancing User Experience and Recommendations:
Google utilizes search history to offer personalized recommendations and suggestions, improving the user experience and helping users discover content and services aligned with their interests.
- Security and Account Recovery:
Tracking search activities enables Google to detect unauthorized access attempts and protect user accounts. It also assists in account recovery by verifying search patterns and preferences.
- Legal and Regulatory Compliance:
Google stores search history to comply with legal and regulatory requirements, such as data protection laws and providing data for legal investigations on court orders.
What Information Does Google Store About You?
Google collects comprehensive information about your online activities, allowing them to build a detailed profile of you. Here is a summary of the data Google accumulates:
- Geographical data and usage patterns via Google Maps.
- Information on the languages you use.
- Details about your political inclinations, beliefs, interests, and hobbies.
- Records of your searches conducted on Google.
- Complete access to your Gmail inbox.
- Insight into the YouTube content you view and the comments you make.
- Storage and analysis of all your files in Google Drive.
- Monitoring of the Android applications you utilize and the frequency of their usage.
- Tracking your online shopping behavior on websites that employ Google Analytics.
- Monitoring your expenditures through Google Pay.
- Observing the advertisements you view or interact with.
- Logging your IP address.
- Monitoring your system's activity.
- Capturing and storing audio data.
- Tracking your engagement with various online content.
- Utilizing browser cookies to gather information.
How Google Gets Your Data?
Evading Google's pervasive data collection practices can be quite challenging. Merely abstaining from using the Google Chrome browser or surfing the web in incognito mode may not guarantee data protection, as you might expect. In reality, it is highly probable that you are still transmitting data to Google.
The company employs an extensive array of methods to amass user data that goes beyond its renowned search engine. Google actively utilizes its services, applications, devices, products, and affiliated websites to track individuals. Moreover, Google establishes partnerships with external entities to access and collect user data, as exemplified by its collaboration with MasterCard. Consequently, simply switching to a private search engine is insufficient to safeguard your information.
Considering that Google gathers data from the websites you visit, it can gain access to any content you upload, receive, or generate through its applications and services. Furthermore, through sophisticated algorithms, Google can even track your whereabouts throughout the day, leveraging the ubiquitous presence of mobile devices. Given the omnipresence of Google, you may be wondering what actions can be taken to mitigate its impact.
One effective measure to prevent Google from accessing your information is to conceal your IP address and encrypt your data. By connecting to a reputable Virtual Private Network (VPN) like CyberGhost, you can swiftly enhance your online privacy with just a few clicks. This solution empowers individuals to reclaim control over their data and fortify their digital privacy.
How To Delete Your Browser History And Clear Recent Searches On Google?
Probably, you empty your browser cache regularly to protect your privacy. If you don’t do it, you should begin now. Deleting your browser history and clearing recent searches on Google can help protect your privacy and prevent your search history from being stored. Regardless of which browser your use on your desktop, follow these step-by-step instructions to securely wipe your Google search history:
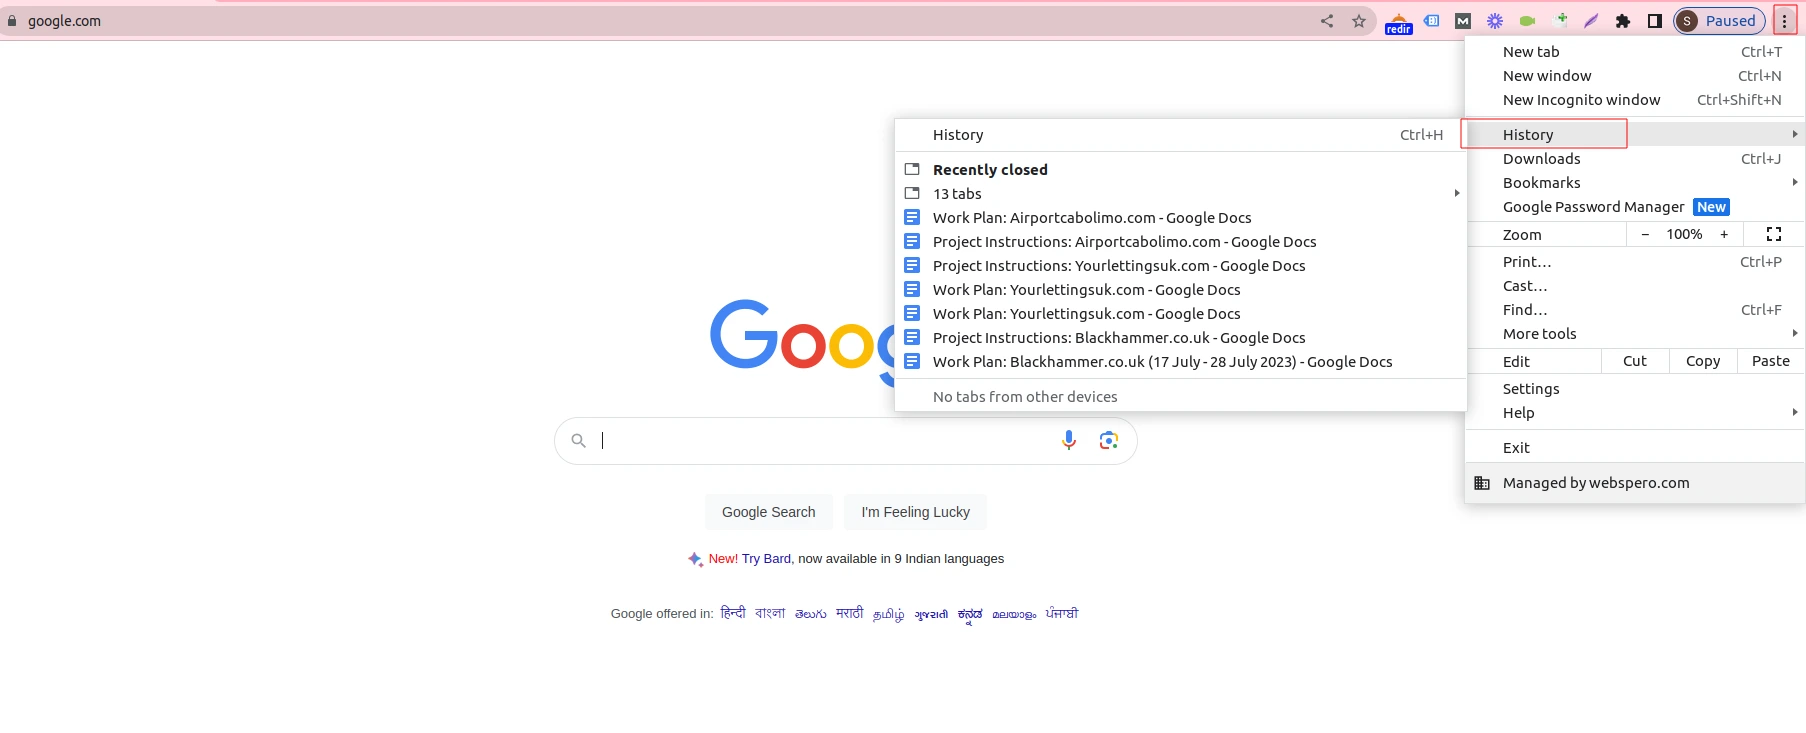
Step 1: Open your browser history
To access your browsing history, open your web browser and press "Ctrl+H" on your keyboard. Alternatively, you can click on the three vertical dots located at the upper right corner of your browser window and select "History" from the drop-down menu. A new pop-up will appear on your screen and then click on “History”. After this, you will be able to see a list of websites you have browsed.
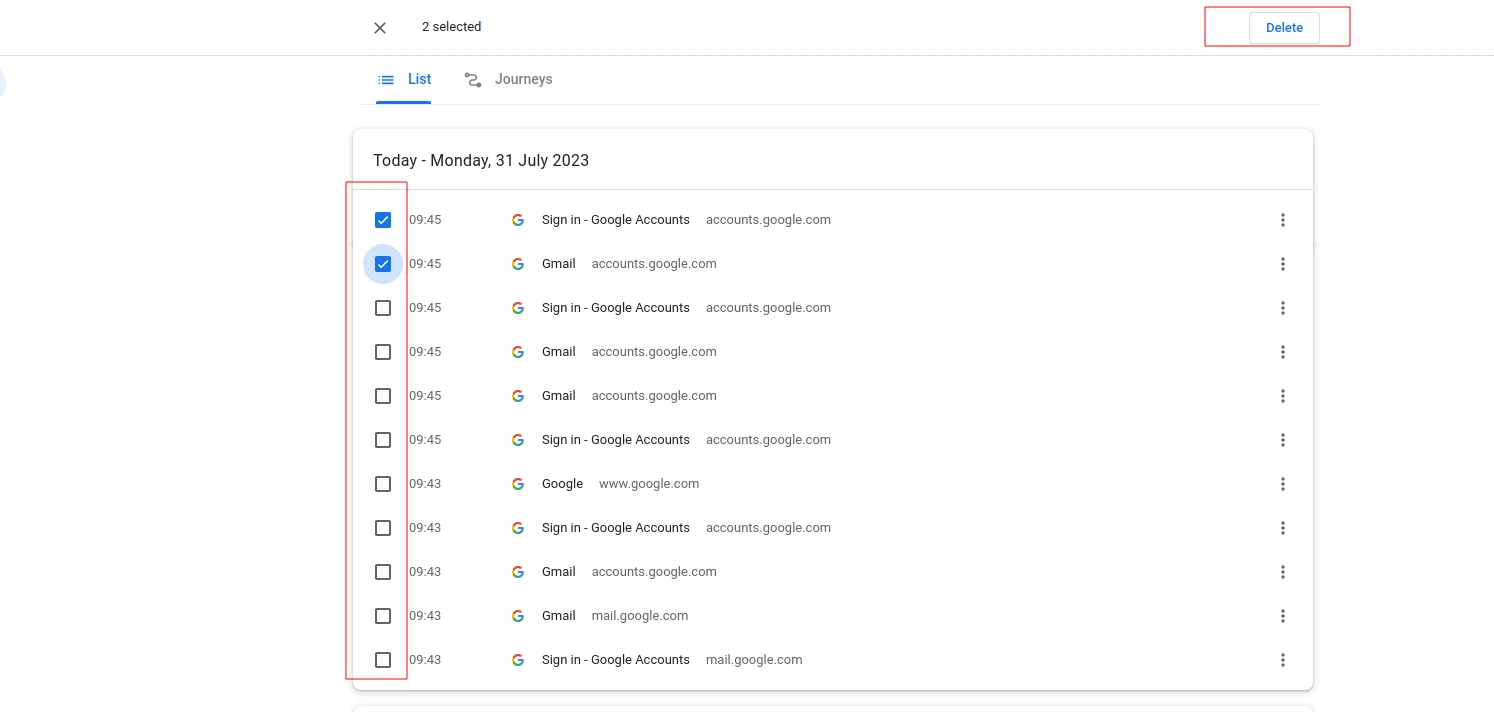
Step 2: Delete specific items
If you want to delete specific items from your search history, select the checkboxes next to each item you wish to remove. Then, click on the "Delete" button located at the upper right side of the page. This will delete the selected items from your history.
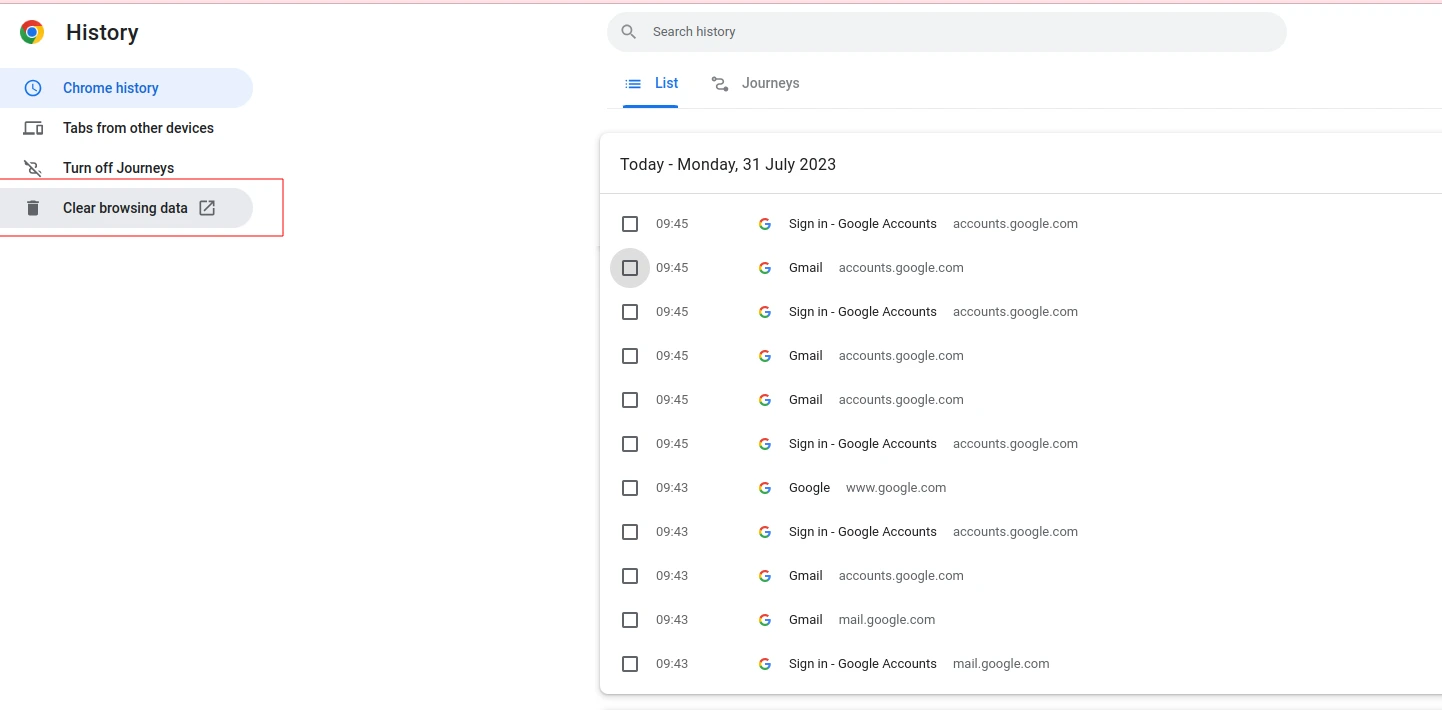
Step 3: Clear your entire browsing history
To erase your entire browsing history, click on the "Clear browsing data" option in the menu on the left side of the screen.
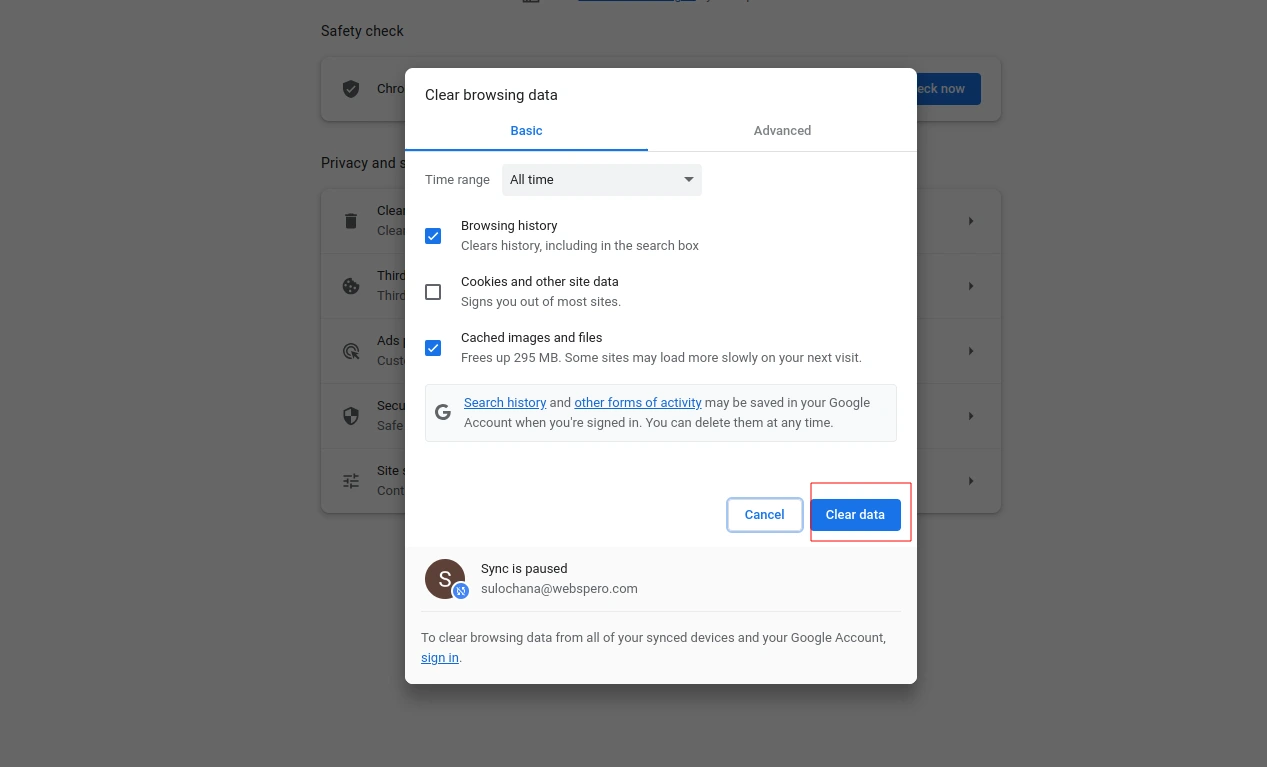
Step 4: Select the type of data you want to remove
A new pop-up window will appear, giving you the option to select the types of data you want to delete. If you only want to delete your search history, make sure the box next to "Browsing history" is checked. You can also choose to delete other types of data, such as cookies, cached images and files, and more.
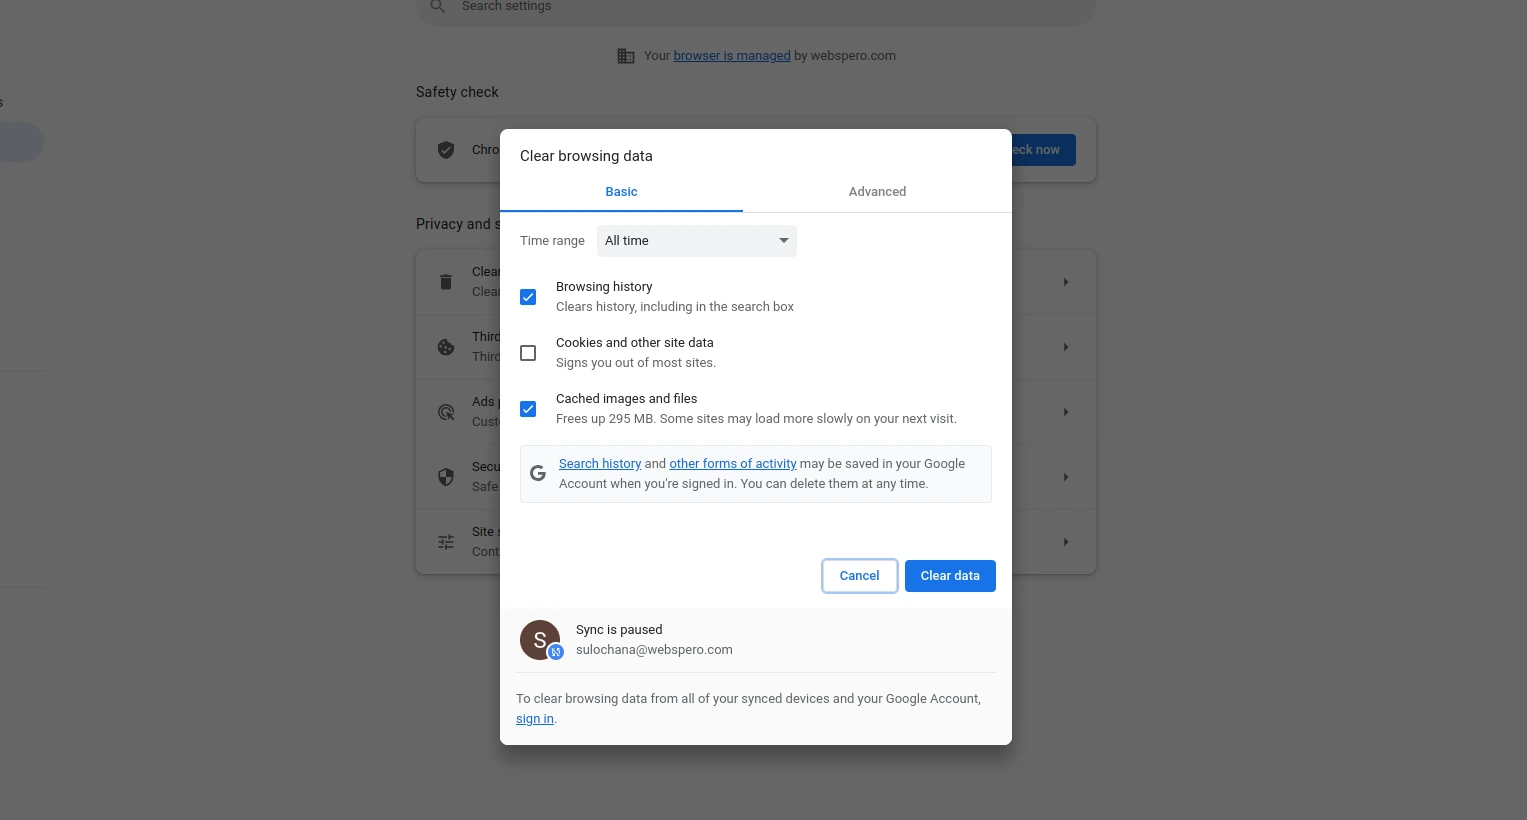
Step 5: Choose the time range (optional)
If you want to delete browsing data for a specific time period, select the time range from the drop-down menu in the pop-up window. For example, you can choose to delete data from the past hour, day, week, or month. If you want to delete your entire history, select "All time."
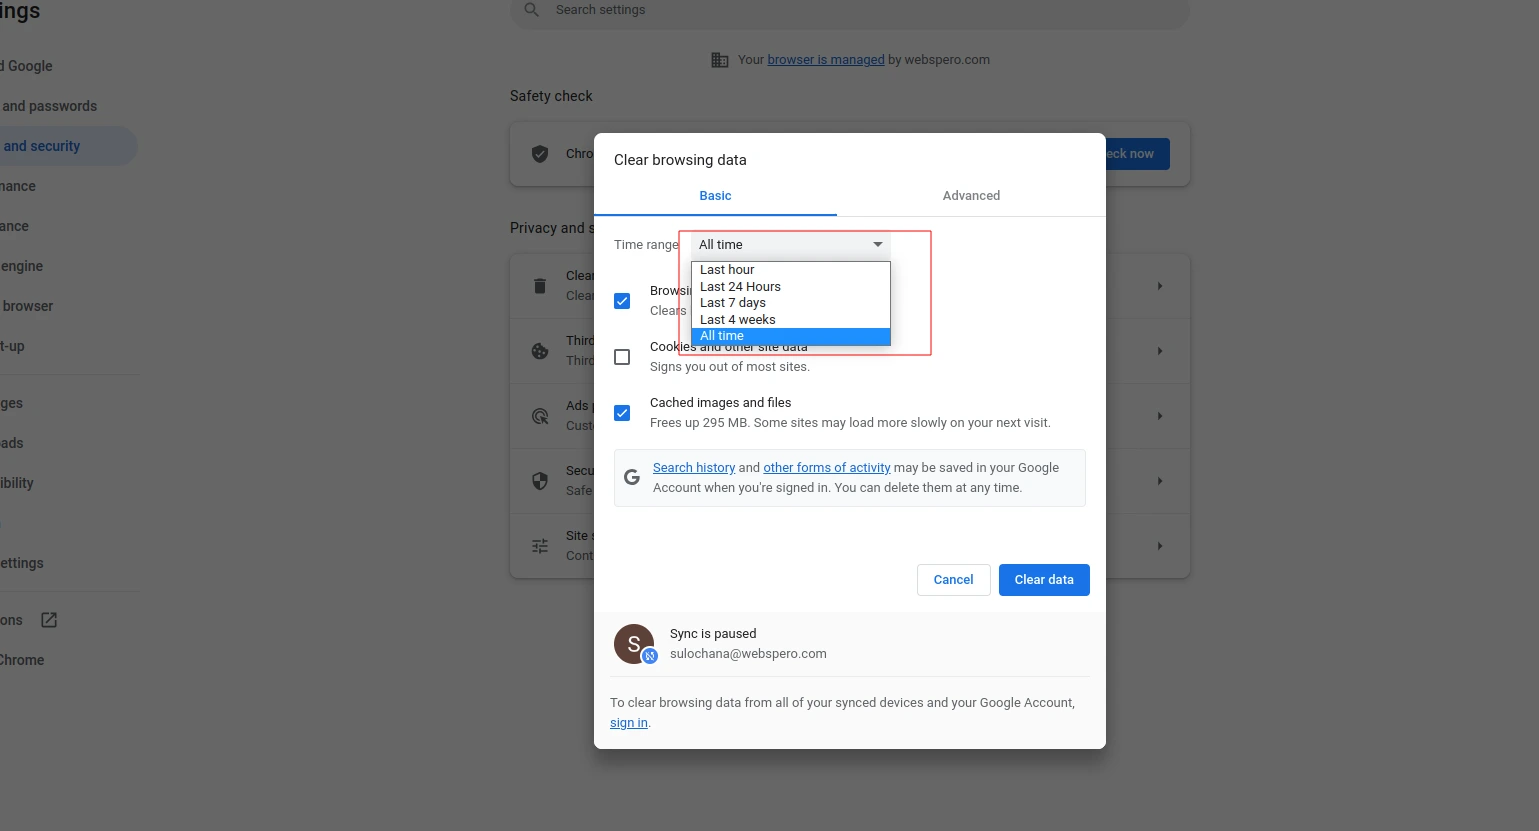
Step 6: Clear your data
Once you have selected the data and time range (if applicable), click on the "Clear data" button. This will initiate the deletion process.
Step 8: Confirm deletion
A confirmation prompt may appear asking you to confirm the deletion. Review the message carefully, as it states that the action cannot be undone. If you are sure you want to proceed, click on the "Clear" or "Delete" button to confirm.
Step 9: Repeat for other browsers and devices
If you use multiple browsers or devices, it is recommended to repeat the above steps for each one to ensure comprehensive removal of your search history.
NOTE - While this clears your browsing history from your local device, it does not guarantee complete removal of all data associated with your searches from Google's servers. However, taking these steps significantly reduces the extent of data collection and helps protect your privacy online.
Deleting Google Search History on Phone And Desktop - All At Once
In order to delete your browsing history from Google’s servers, you need to erase it from your Google Account. Note that if you sync your Google Account on multiple devices, deleting history from one will delete it from all devices by following the below steps:
Step 1: Sign in to your Google Account by visiting the Google homepage and clicking on the "Sign in" button at the top right corner. Enter your credentials to proceed.
Step 2: Access your Google Account settings by clicking on your profile picture or initial at the top right corner and selecting "Google Account" from the dropdown menu.
Step 3: Navigate to your Google Account data by scrolling down the settings page and clicking on the "Data & privacy" option in the left-hand side menu.
Step 4: Manage your Google Activity within the "Data & personalization" section. Click on the "Activity controls" tab to find the list of activities Google tracks, including "Web & App Activity" for your search history.
Step 5: Pause your Web & App Activity by toggling off the switch next to it. This temporarily stops Google from recording your search history but does not delete existing data.
Step 6: Delete your existing search history by clicking on "Manage your activity" under the "Web & App Activity" section. A new page will show a chronological list of your searches.
Step 7: Adjust your search history deletion settings on the search history page. Select specific searches to delete or choose the "Delete activity by" option on the left-hand side to delete all history within a chosen time range.
Step 8: Confirm and delete your search history by clicking the "Delete" button. Google will permanently remove the selected search history from your account after confirming the deletion.
Step 9: Set up automatic deletion (optional) by going back to the main "Activity controls" page and selecting the "Auto-delete" option. Choose to automatically delete your data every 3 months or every 18 months.
Step 10: Review and adjust other privacy settings in the "Data & personalization" section. Customize options like "Location History," "YouTube History," and "Ad personalization" according to your preferences to enhance online privacy.
Why Should You Use a VPN With Google Search?
While deleting your Google search history can help control the amount of your online data, it's important to note that Google still retains records of your usage patterns and activities. To ensure comprehensive privacy while browsing the internet, utilizing a VPN is crucial. Here are some reasons why you should consider using a VPN with Google Search:
-
Enhanced Privacy:
A VPN encrypts your online activities, making it difficult for ISPs and third parties to monitor or track your search history.
-
Anonymous Browsing:
A VPN hides your IP address, preserving your anonymity and making it challenging to trace your searches back to you.
-
Circumvent Geo-Restrictions:
By connecting to a VPN server in a different location, you can access region-specific or blocked content on Google Search.
-
Secure Public Wi-Fi:
VPN encryption protects your data from potential hacking or eavesdropping on insecure public Wi-Fi networks.
-
Prevent Targeted Advertising:
Using a VPN makes your searches anonymous, reducing the personalized ads you encounter on Google Search.
-
Avoid Search Bias:
By connecting to servers in different locations, a VPN helps overcome location-based search biases, offering diverse search results.
-
Protect Against Data Collection:
While not stopping data collection entirely, a VPN limits the data Google can associate directly with you.
-
Prevent Data Throttling:
Some ISPs may intentionally slow down your internet connection based on your online activities, including heavy Google searches. With a VPN like ExpressVPN, your traffic is encrypted and hidden from your ISP
How To Control Your Google Search Activity With A VPN?
Controlling your Google Search activity with a VPN involves the following steps:
-
Select a Reliable VPN Provider:
Choose a reputable VPN service that offers strong encryption, a strict no-logs policy, a wide range of server locations, and fast connection speeds. Ensure the VPN provider prioritizes privacy and security.
-
Install and Set Up the VPN:
Download the VPN app from the provider's website or the official app store. Follow the instructions for installing a VPN on your device and set it up. You may need to create an account and choose a server location.
-
Connect to a VPN Server:
Launch the VPN app and connect to a server of your choice. It is recommended to choose a server location that aligns with your privacy needs or to bypass geo-restrictions.
-
Conduct Google Searches:
Once the VPN connection is established, use your preferred web browser to perform Google searches as usual. Your internet traffic will be encrypted and routed through the VPN server, protecting your privacy and masking your IP address.
-
Protect Search History from ISP:
The VPN encrypts your internet traffic, preventing your Internet Service Provider (ISP) from monitoring or tracking your Google search activity. This adds an extra layer of privacy and ensures that your searches remain confidential.
-
Evade Geo-restrictions:
By connecting to a VPN server in a different location, you can bypass geo-restrictions and access Google search results or services that may be limited in your region. This expands your search capabilities and allows you to view content specific to other countries.
Remember that while a VPN enhances privacy and security, it does not affect the data Google collects directly.
Best VPNs To Use With Google Search:
Here are some reputable VPN providers known for their strong privacy features and overall performance:
- ExpressVPN: Keeps your browsing info private with independently audited No-Logs policy
- CyberGhost: User-Friendly and keeps your online activities private
- Private Internet Access (PIA): A reliable VPN with a strict no-logs policy, customizable settings for fast and secure browsing
Remember to evaluate each VPN provider based on your specific needs, such as server locations, encryption protocols, speed, and compatibility with your devices.
The Bottom Line
Using a VPN with Google Search enhances online privacy and security. Choose a reliable VPN provider with strong encryption, a strict no-logs policy, and diverse server locations. Combining VPN usage with deleting browsing history and recent searches on Google reduces data associated with your searches. Explore VPNGuide for unbiased reviews and assistance in finding the right VPN solution to protect your online privacy while using Google Search.