
VPN is a great option for people who value their online privacy and want to keep their online activities private while browsing the web. It's also the most effective way to access websites that are restricted at your location. However, setting up a VPN can be a bit tricky, especially for Apple users. Apple devices come in different forms, such as the iPhone, Mac and Apple TV.
The process of setting up a VPN can vary from one device to another, making it even more challenging. In this series of articles, we will be guiding you on how to set up a VPN on various Apple products. We already showed you how to set it up on an Apple iPhone. This article will walk you through the steps to get your VPN up and running on a Mac.
Setting Up and Using VPN on a Mac
Before we get to setting up the VPN on a Mac, it is important to choose a secure VPN provider. Make sure to select a VPN provider that offers encryption, has robust privacy policies, offers a wide range of server locations, and most importantly, available within your budget. Some popular VPN providers to consider are ExpressVPN, NordVPN and ProtonVPN. Now let’s move on to the setup.
Before we begin, check that you have all the necessary information before setting up a VPN using the Mac's built-in VPN settings. This includes the shared secret, username, password, server address, VPN type etc. All of this data is provided by your VPN operator and is unique to each VPN.
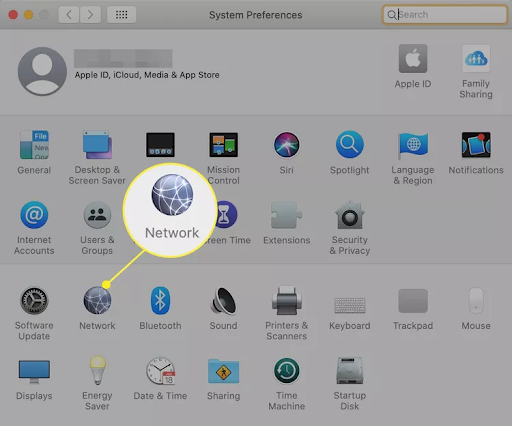
- Select the Apple icon on your screen and go to System Preferences and then Network.
- You will find a Plus sign that will create a new connection. Click on it.
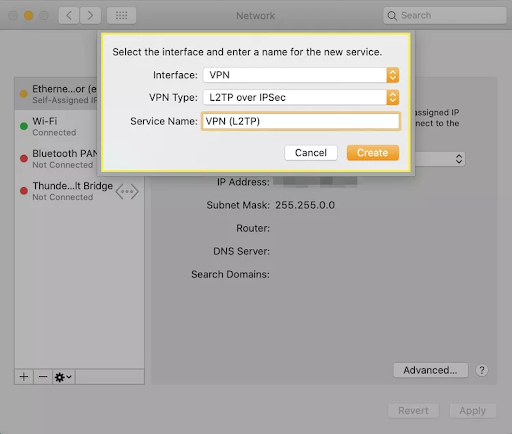
- You will be prompted with a form that lets you choose from options like Interface (choose VPN), VPN Type (Choose L2PT over IPSec) and Service Name (Choose VPN (L2TP)). Once you choose, click Create.
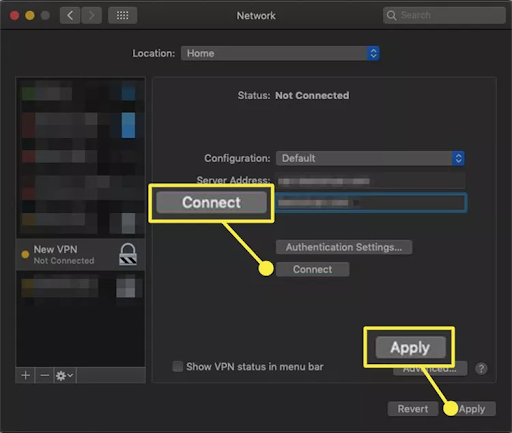
- You will see a new screen where you will have to fill in the server address and account name. Then select Authentication Settings.
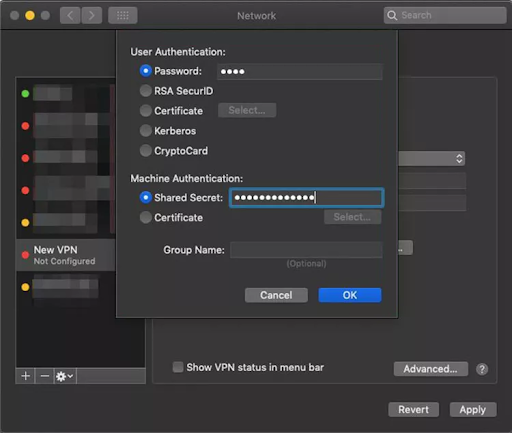
- Fill in the prompt with the password and the Shared Secret.
- You will get another prompt, for which you can select Apply and then Connect.
 That’s it. You have successfully connected to the VPN. You can select Disconnect if you want to turn the VPN off.
Tips and Best Practices
Now you know how to set up a VPN on your Mac, but here are a couple more tips you may want to consider for things to function smoothly without any hiccups.
Choosing a Secure and Reliable VPN Provider
Earlier in this article, we mentioned how choosing a VPN provider is important. Hence, research about different VPN providers available. Check if the shortlisted ones within your budget have a good track record with positive user reviews. Also verify if they offer reliable services and good customer support. Click here for some useful insights on choosing the right VPN provider.
Make sure your VPN provider supports encryption protocols such as OpenVPN or IKRv2. Also, ensure if they have a strict no-logs policy, meaning they wouldn’t store and sell information about your browsing habits and online activities.
Considering the server location for various needs
One of the most important factors to look out for is speed. So when you configure your VPN, make sure it connects to the fastest available server automatically. Also make sure your VPN provider has servers close to your actual location. This will help minimize latency and therefore improve speed.
The closest and fastest available server is the ideal option most of the time, but not necessarily to get around censorship. If you want to surpass geo-blocking to access certain content not available at your location, choose a VPN provider that has servers in locations where it is available. This will help you access that specific content.
Conclusion
You are now equipped with the knowledge of how to set up a VPN on your Mac. This setup adds an extra layer of protection and flexibility to your online activities. You can now access geo-restricted content, protect your sensitive data, get around censorship and browse the internet without a worry. But keep in mind the best practices as well to have a smooth experience with your VPN providers.